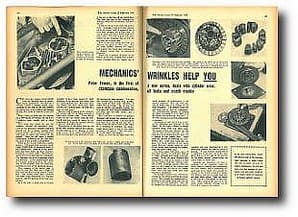
Can everyday motor cyclists benefit from the methods used by professional mechanics? To find out I recently visited a dealer's repair shop, checking on the type of job that. cropped up, seeing how it was tackled and looking for tips that could be valuable to you and me.
When I arrived, work was just starting on a 1959 Model 50 Norton, but the hints I collected apply equally well to other makes.
Enjoy more Classic MotorCycle reading in the monthly magazine.
Click here to subscribe & save.
First thing that struck me was the similarity between the mechanic's diagnosis of the machine's ailments and that carried out by a doctor dealing with human beings. For a start the physician will want to know the history of the patient. Then he will make a careful examination, following up the clues until the cause is established.
Work on the Norton followed a similar pattern. The model had covered a shade under 20,000 miles of messenger work in the London area. Most of its life, therefore, had been spent on short journeys, frequently in heavy traffic. Maintenance appeared to have been kept to a minimum. The machine was in for a complete check and overhaul. It was interesting to note, as stripping progressed, how the condition of the internals bore out what was expected in view of the operating history.
After removal of the petrol tank, it could be seen that there was a slight oil leak from the front of the exhaust rocker box. The rocker boxes were removed (the studs being withdrawn in a diagonal pattern), and the leak pinpointed.
 As it was only a small seep, it seemed probably to have been caused by slight loosening of the adjacent stud rather than to a distorted joint face. Had there been any doubt, the face could have been checked on a surface plate – or on a piece of glass.
Removal and stripping of the carburettor (which had no air filter) revealed a badly worn throttle slide. It was deeply ridged on the side remote from the bellmouth and was scored all round its circumference as if grit had reached between it and the carburettor body.
Examination of the nylon filter on top of the float chamber showed tiny particles of cork adhering to it. Bearing in mind what I said earlier about following up clues, the next move was obviously to look at the tap in the base of the petrol tank. The cork seal was in fact breaking up, although there was no external leak from the tap.
A look at the oil in the tank told quite a story. Although it had been kept topped-up to the correct level, it appeared not to have been changed for a long time. It was jet black and had a burnt smell even when cold. This was a good indication (borne out on stripping) that all was not well with the cylinder bore.
Wear in the bore, piston and rings was allowing the gases to blow past. The oil, when rubbed between the fingers, had a gritty feel which drew attention to its abrasive rather than its lubricating properties.
There was a quantity of sludge in the bottom of the tank, formed from condensation resulting from the regular use of the machine for short journeys. The tank was drained and flushed with paraffin. This could be done quite effectively at home with a syringe. An airline was used to remove any paraffin residue, but here again the tank could be swabbed with dry cloth (not the fluffy variety) and a rod.
Next task was to remove the primary chaincase and inspect the condition of the clutch and primary drive. One little point that those of us that do our own jobs at home would do well to note is that, when he is stripping an assembly, the professional always places a box or tray handy to receive the pieces. That can save a lot of lost time and temper.
Again, as with the oil tank, there was ample evidence of condensation in the primary chaincase. The only real solution in either case is to change the oil more frequently. The primary chain was well worn and in need of replacement. The method of washing the chain, stretching it to its limit on a flat surface and measuring, was used. If the wear exceeds ¼in per foot, replacement is necessary.
An example of how easy it is to be misled by symptoms was provided by the clutch. At first sight it looked as though excessive lining wear had taken place. The answer in this case, however, was not wear of the friction material. On the inner face of the clutch pressure plate was a coating of oily rubber dust. Again came the process of following up clues. Rubber there could come from only one place – the shock absorber in the clutch centre. And sure enough, round the edges of the circular plate retaining the rubbers, there was more rubber dust.
 The clutch plates had shown signs of heat, due possibly to prolonged slipping in traffic, although the linings were serviceable. When the shock absorber was dismantled, it came as no surprise to find that the rubbers had been suffering from heat as well. Although separate when the unit was new, some of the rubbers had been forced past the top of the central metal vane and had fused with their neighbours.
The damaged rubbers were removed by tapping out the metal vane from the clutch centre. This brought the rubbers with it. Reassembly was made easier with the aid of an old gearbox mainshaft. This can be clamped in a vice and the clutch centre complete with vane, positioned on it. The three large rubbers can then be placed in position. It goes without saying that it is important to see they are in the right place; that is, on the right of the recesses for the clutch springs, viewed facing the clutch from its outer end.
Adopting this procedure, the vane is stationary on the mainshaft while the clutch centre is rotated, thus compressing the large rubbers, and so permitting the small ones to be fitted. If a suitable C-spanner is not readily available a simple, but effective tool can be made from two old plain dutch plates. These are bolted at one side to a foot length of mild-steel strip. After slipping the tool on to the clutch centre sufficient leverage can be obtained to compress the rubbers. ![]()
Advert
 Enjoy more The Classic MotorCycle reading in the monthly magazine. Click here to subscribe.


